Jupyter kernel creation
JupyterLab is the latest web-based interactive development environment for notebooks, code, and data. Its flexible interface allows users to configure and arrange workflows in data science, scientific computing, computational journalism, and machine learning. The Jupyter Notebook is the original web application for creating and sharing computational documents.
Both JupyterLab and Jupyter Notebook are supported on Open OnDemand of RCAC clusters. This tutorial will introduce how to create a personal kernal using the terminal, then run python codes on Open OnDemand Jupyter with the newly created kernel.
To facilitate the process, we provide a script conda-env-mod that generates a module file for an environment, as well as an optional Jupyter kernel to use this environment in Jupyter.
Step1: Load the anaconda module
You must load one of the anaconda modules in order to use this script:
module spider anaconda
module load anaconda/xxxx    ## choose the anaconda and python version you want to use
Step 2: Create a conda environment
By default, conda-env-mod will only create the environment and a module file(no Jupyter kernel). If you plan to use your environment in a Jupyter, you need to append a --jupyter flag:
conda-env-mod create -n mypackages --jupyter
Step 3: Load the conda environment
The following instructions assume that you have used conda-env-mod script to create an environment named mypackages:
module load use.own
module load conda-env/mypackages-py3.8.5 # py3.8.5 is associated with the python in the loaded anaconda module.
Step 4: Install packages
Now you can install custom packages in the environment using either conda install or pip install:
conda install Package1
pip install Package2
Step 5: Open OnDemand Jupyter
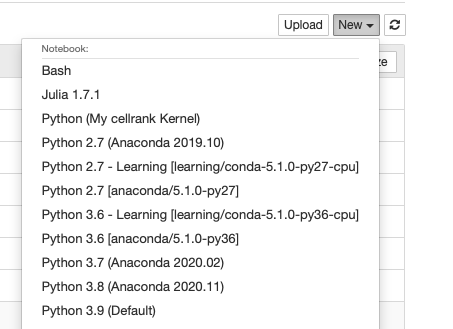
In Jupyter Lab or Jupter Notebook of Open OnDemand, you can create a new notebook with the newly created kernel.
Example: CellRank
CellRank is a toolkit to uncover cellular dynamics based on Markov state modeling of single-cell data (https://github.com/theislab/cellrank).
Create a conda environment with Jupyter kernel:
module load anaconda/2020.11-py38
conda-env-mod create -n cellrank --jupyter
Next we can load the module, and install CellRank:
module load use.own
module load conda-env/cellrank-py3.8.5
conda install -c conda-forge -c bioconda cellrank
Select the newly created kernel Python(My cellrank Kernel) in Jupyter Notbook or Jupyter Lab.
Now we can use Python(My cellrank Kernel) to run scRNAseq analysis.
